Arbutus object storage clients: Difference between revisions
(remove s3cmd content, now linked separately) |
No edit summary |
||
| Line 4: | Line 4: | ||
<!--T:1--> | <!--T:1--> | ||
For information on obtaining Arbutus Object Storage, please see [[Arbutus object storage|this page]]. For information on how to use an object storage client to manage your Arbutus object store, choose a client and follow instructions from these pages: | For information on obtaining Arbutus Object Storage, please see [[Arbutus object storage|this page]]. For information on how to use an object storage client to manage your Arbutus object store, choose a client and follow instructions from these pages: | ||
# [[ | # [[ Accessing object_storage with s3cmd ]] | ||
# WinSCP | # WinSCP | ||
# awscli | # awscli | ||
Revision as of 20:07, 27 February 2023
For information on obtaining Arbutus Object Storage, please see this page. For information on how to use an object storage client to manage your Arbutus object store, choose a client and follow instructions from these pages:
- Accessing object_storage with s3cmd
- WinSCP
- awscli
It is important to note that Arbutus' Object Storage solution does not use Amazon's S3 Virtual Hosting (i.e. DNS-based bucket) approach which these clients assume by default. They need to be configured not to use that approach, as described in the pages linked above.
WinSCP
Installing WinSCP
WinSCP can be installed from https://winscp.net/.
Configuring WinSCP
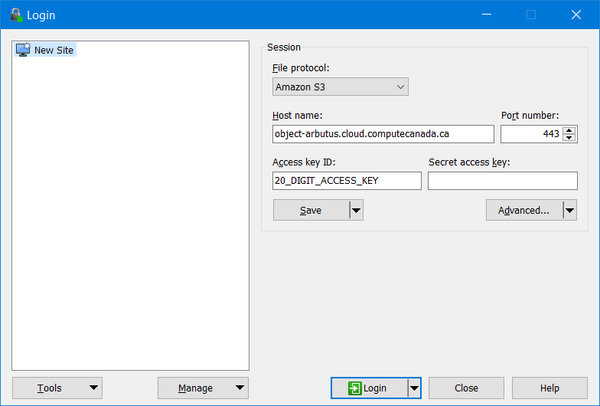
Under "New Session", make the following configurations:
- File protocol: Amazon S3
- Host name: object-arbutus.cloud.computecanada.ca
- Port number: 443
- Access key ID: 20_DIGIT_ACCESS_KEY
and "Save" these settings as shown below
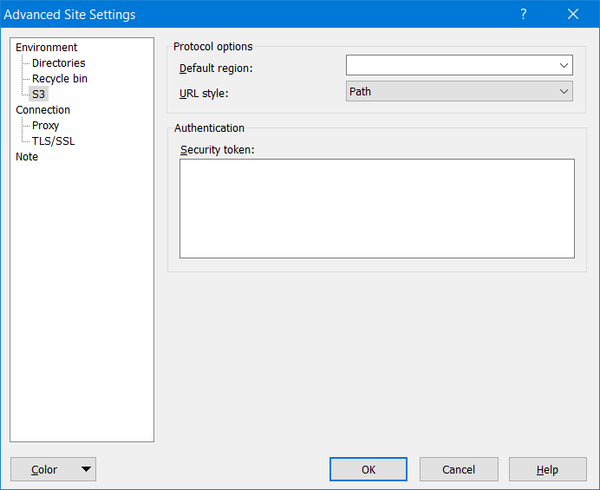
Next, click on the "Edit" button and then click on "Advanced..." and navigate to "Environment" to "S3" to "Protocol options" to "URL style:" which must changed from "Virtual Host" to "Path" as shown below:
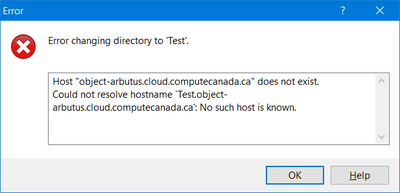
This "Path" setting is important, otherwise WinSCP will not work and you will see hostname resolution errors, like this:
Using WinSCP
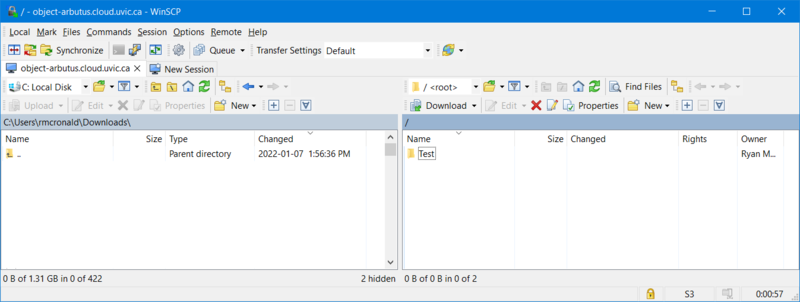
Click on the "Login" button and use the WinSCP GUI to create buckets and to transfer files:
Access Control Lists (ACLs) and Policies
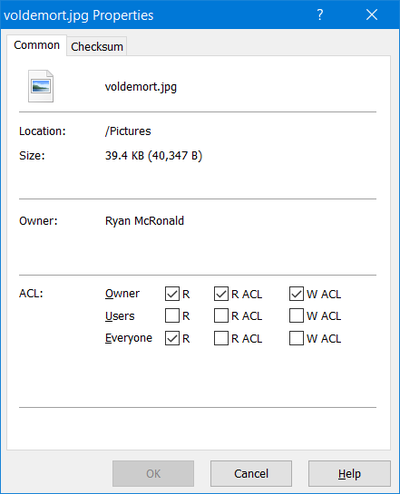
Right-clicking on a file will allow you to set a file's ACL, like this:
AWS CLI
The awscli client also works with the Object Store service with better support for large (>5GB) files and the helpful sync command. However, not all features have not been tested.
Installing awscli
pip install awscli awscli-plugin-endpoint
Configuring awscli
Generate an access key ID & secret key
openstack ec2 credentials create
Edit or create ~/.aws/credentials and add the credentials generated above
[default]
aws_access_key_id = <access_key>
aws_secret_access_key = <secret_key>
Edit ~/.aws/config and add the following configuration
[plugins]
endpoint = awscli_plugin_endpoint

[profile default]
s3 =
  endpoint_url = https://object-arbutus.cloud.computecanada.ca
  signature_version = s3v4
s3api =
  endpoint_url = https://object-arbutus.cloud.computecanada.ca
Using awscli
export AWS_PROFILE=default
aws s3 ls <container-name>
aws s3 sync local_directory s3://container-name/prefix
More examples can be found here: https://docs.ovh.com/us/en/storage/getting_started_with_the_swift_S3_API/
