Translations:CephFS/20/en: Difference between revisions
Jump to navigation
Jump to search
(Importing a new version from external source) |
(Importing a new version from external source) |
||
| Line 5: | Line 5: | ||
: <i>Access Level</i> = select <i>read-write</i> or <i>read-only</i> (you can create multiple rules for either access level if required) | : <i>Access Level</i> = select <i>read-write</i> or <i>read-only</i> (you can create multiple rules for either access level if required) | ||
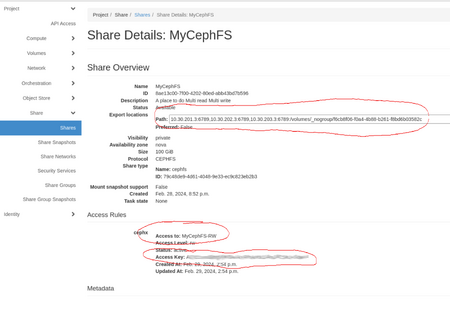
: <i>Access To</i> = select a key name that describes the key, this name is important, it will be used in the cephfs clien config on the VM, we will use <i>MyCephFS-RW</i> on this page. | : <i>Access To</i> = select a key name that describes the key, this name is important, it will be used in the cephfs clien config on the VM, we will use <i>MyCephFS-RW</i> on this page. | ||
[[File:Cephfs created.png|450px|thumb|left|| | [[File:Cephfs created.png|450px|thumb|left||Properly configured CephFS]] | ||
<br clear=all> | <br clear=all> | ||
Revision as of 15:02, 15 April 2024
- Create an access rule to generate access key.
- In Project --> Share --> Shares --> Actions column, select Manage Rules from the drop-down menu.
- Click on the +Add Rule button (right of the page).
- Access Type = cephx
- Access Level = select read-write or read-only (you can create multiple rules for either access level if required)
- Access To = select a key name that describes the key, this name is important, it will be used in the cephfs clien config on the VM, we will use MyCephFS-RW on this page.
