VNC
Frequently, it may be useful to start up graphical user interfaces for various software packages like Matlab. Doing so over X-forwarding can result in a very slow connection to the server, one useful alternative to X-forwarding is using VNC to start and connect to a remote desktop.
VNC Client
First you will need to install a VNC client on your machine to connect to the VNC server. We recommend using TigerVNC. It is pre-package on most Linux distributions and comes with Windows and Mac binaries.
Windows and Mac
Starting at the TigerVNC home page
- click on the GitHub release page link
- scroll down and click on the Binaries are avaiable from bintray link
- scroll down and pick the .exe file for Windows (note the 64 for 64 bit Windows) or the .dmg file for Mac
If asked during the installation, do not enable the VNC server (this would be for sharing your desktop, not for connecting to our systems).
Linux
Install the TigerVNC viewer with your package manager and then symlink ~/.vnc/x509_ca.pem to your system certificate authority list.
Debian or Ubuntu
[name@local_computer]$ sudo apt-get install tigervnc-viewer
[name@local_computer]$ mkdir --parents ~/.vnc
[name@local_computer]$ ln --symbolic --interactive --no-target-directory /etc/ssl/certs/ca-certificates.crt ~/.vnc/x509_ca.pem
Fedora, CentOS, or RHEL
[name@local_computer]$ sudo yum install tigervnc
[name@local_computer]$ mkdir --parents ~/.vnc
[name@local_computer]$ ln --symbolic --interactive --no-target-directory /etc/pki/tls/certs/ca-bundle.crt ~/.vnc/x509_ca.pem
Gentoo
[name@local_computer]$ emerge -av net-misc/tigervnc
[name@local_computer]$ mkdir --parents ~/.vnc
[name@local_computer]$ ln --symbolic --interactive --no-target-directory /etc/ssl/certs/ca-certificates.crt ~/.vnc/x509_ca.pem
VNC Server
Now you need a VNC server to connect to. This can be either the dedicated VDI login system on graham or one you start manually on an allocated compute node.
VDI Login Nodes
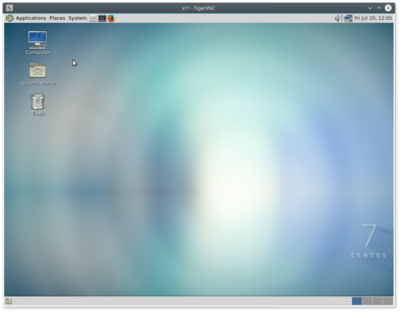
Graham has a dedicated VNC login nodes that provide a full graphical desktop, accelerated OpenGL, and access to home, project, and scratch. You can connect to them directly by starting your vncviewer (e.g., for TigerVNC, start the client from your Applications menu or run vncviewer from the command line) and entering the address gra-vdi.computecanada.ca. This will bring up a login screen to which you can login using your Compute Canada credentials.
As with regular login nodes, these VDI logins nodes are a shared resource and are not intended for doing batch computation (that is what the compute nodes are for), so please limit your use of them to graphical related tasks. A none-exclusive list of examples includes graphical pre-processing steps such as mesh generation, graphical post-processing steps such as visualization, and using graphical IDEs.
Installing software
Open-source software is provided by the nix module. Click the black terminal icon on the top menu bar or pick Applications -> System Tools -> Terminal and load the nix module. Then you can search for programs using the nix search <regexp> command and install then in your environment using the nix-env --install --attr <attribute> command. As an example, say you wanted to install QGIS for your use
[name@gra-vdi4]$ module load nix
[name@gra-vdi4]$ nix search qgis
Attribute name: nixpkgs.qgis
Package name: qgis
Version: 2.18.20
Description: User friendly Open Source Geographic Information System
[name@gra-vdi4]$ nix-env --install --attr nixpkgs.qgis
Your nix environment persists, so you only need to run an install command once. Whatever you have installed will then be available anytime to module is loaded.
[name@gra-vdi4]$ module load nix
[name@gra-vdi4]$ qgis
Building OpenGL applications
For accelerated OpenGL to work, it is necessary to pre-load an appropriate version of the vglfaker.so library from VirtualGL. This has already be done for software installed by staff, and is done automatically for any OpenGL software built/installed via Nix, but it is something you have to do yourself for software you install yourself.
The easiest way to do this is use the patchelf utility from nix (use nix-env --install --attr nixpkgs.readelf to install it) to adjust the final binary.
For example, say you built an OpenGL application against the system libraries and installed it as ~/.local/bin/myglapp. Then you need to add the system VirtualGL library /usr/lib64/VirtualGL/libvglfaker.so as the first required library to it
[name@gra-vdi4]$ module load nix
[name@gra-vdi4]$ patchelf --add-needed /usr/lib64/VirtualGL/libvglfaker.so ~/.local/bin/myglapp
Note that it is also possible to pre-load vglfaker.so via the LD_PRELOAD environment variable. This is generally a bad idea as it applies indiscriminately to all binaries, and those that require a different vglfaker.so than that set in LD_PRELOAD will then fail, but it can be used appropriately in some cases when creating a wrapper script.
Compute Nodes
A VNC server can also be started in a compute node, and, with suitable port forwarding, you can connected to from your desktop. This gives you dedicated access, but does not provide a full graphical desktop or hardware accelerated OpenGL.
Starting a VNC server
Before starting your VNC server, you will need a node on which to run it. The easiest way to do so is typically in the framework of an interactive job using salloc. As an example, to request an interactive job using 4 cpus and 16GB of memory, you would use the command:
[name@server ~]$ salloc -c 4 --mem 16g
Once your interactive job has started, you can start a VNC server with vncserver. You should take note of which node your job is running on, as well as which port (typically 5901). If unsure, you can use the hostname command to check which host your job is running on. You will be prompted to set a password for your VNC server - DO NOT LEAVE THIS BLANK.
Command with sample output:
[name@server ~]$ vncserver
You will require a password to access your desktops.

Password:
Verify:
Would you like to enter a view-only password (y/n)? n

New 'gra796:1 (username)' desktop is gra796:1

Creating default startup script /home/username/.vnc/xstartup
Creating default config /home/username/.vnc/config
Starting applications specified in /home/username/.vnc/xstartup
Log file is /home/username/.vnc/gra796:1.log
You will likely want to cat the log file to determine which port the VNC server is using, in this case, the key line to find is the following:
vncext: Listening for VNC connections on all interface(s), port 5901
Setting up an SSH tunnel to the VNC server
Now that your VNC server has been started, you will need to create a "bridge" to allow your local desktop computer to connect to the compute node directly. This bridge connection is created using an SSH tunnel. SSH tunnels are created using the same SSH connection command as usual, with an extra option added - this follows the format: ssh user@host -L port:compute_node:port.
An example SSH tunnel command to connect to a VNC server running on Graham's gra796 node and port 5901 would be the following:
ssh username@graham.computecanada.ca -L 5900:gra796:5901
The SSH tunnel will operate like a normal SSH connection- you may run commands over it, etc. However, keep in mind that this is your connection to the VNC server. If you terminate the SSH tunnel, your connection to the VNC server will be lost! For more detailed information on SSH tunneling, please see SSH_tunnelling.
Connecting to the VNC server
To connect to the VNC server, you need to tell your VNC client to connect to localhost. The following example uses TigerVNC's vncviewer to connect to the running VNC server on gra796. You will be prompted for your password that you set earlier before you can connect.
Command with sample output:
[name@local_computer]$ vncviewer localhost
TigerVNC Viewer 64-bit v1.8.0
Built on: 2018-06-13 10:56
Copyright (C) 1999-2017 TigerVNC Team and many others (see README.txt)
See http://www.tigervnc.org for information on TigerVNC.

Tue Jul 10 17:40:24 2018
 DecodeManager: Detected 8 CPU core(s)
 DecodeManager: Creating 4 decoder thread(s)
 CConn:       connected to host localhost port 5901
 CConnection: Server supports RFB protocol version 3.8
 CConnection: Using RFB protocol version 3.8
 CConnection: Choosing security type VeNCrypt(19)
 CVeNCrypt:   Choosing security type TLSVnc (258)

Tue Jul 10 17:40:27 2018
 CConn:       Using pixel format depth 24 (32bpp) little-endian rgb888
 CConn:       Using Tight encoding
 CConn:       Enabling continuous updates
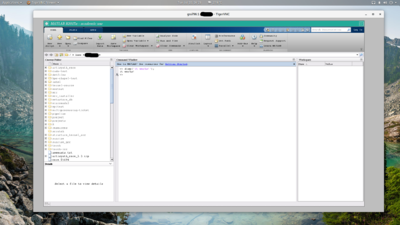
Once connected, you will be presented with an Xterm window and a blank desktop. To launch a program, simply invoke the command as you would normally within the Xterm window. xclock will start a sample clock application you can use to test things out. To start a more complicated program (for instance, Matlab), you would load the module and launch the program via the following:
[name@server ~]$ module load matlab
[name@server ~]$ matlab
Resetting your VNC server password
If you forget your VNC password or otherwise want to delete your VNC configs and start over with a clean slate, you can delete your ~/.vnc directory. The next time you run vncserver, you will be prompted to set a new password.

