Translations:Cloud Quick Start/13/fr: Difference between revisions

From Alliance Doc
Jump to navigation Jump to search
No edit summary
No edit summary
Line 1: Line 1:
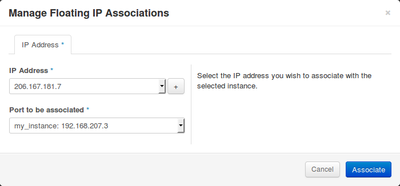
[[File:Manage-Floating-IP-Associations-Form.png|400px|thumb| Gérer les associations d'IP flottantes]]
[[File:Manage-Floating-IP-Associations-Form.png|400px|thumb| Gérer les adresse IP flottantes (Cliquer pour une image plus grande)]]

Revision as of 19:07, 14 April 2016

Information about message (contribute)
This message has no documentation. If you know where or how this message is used, you can help other translators by adding documentation to this message.
Message definition (Cloud Quick Start)
===Network settings===
[[File:Manage-Floating-IP-Associations-Form.png|400px|thumb| Manage Floating IP (Click for larger image)]]
[[File:Add-Rule-Form.png|400px|thumb| Add Rule (Click for larger image)]]
On the <i>Instances</i> page is a list of VMs with their IP address(es) displayed in the <i>IP Address</i> column. Each VM will have at least one private IP address, but some may also have a second public IP assigned to it. When your OpenStack project is created, a local network is also created for you. This local network is used to connect VMs to each other and to an internet gateway within that project, allowing them to communicate with each other and the outside world. The private IP address provides inter VM networking but does not allow for connection to the outside world. Any VM created in your project will have a private IP address assigned to it from this network of the form <code>192.168.X.Y</code>. Public IPs allow outside services and tools to initiate contact with your VM, such as allowing you to connect to your VM via your personal computer to perform administrative tasks or serve up web content. Public IPs can also be pointed to by domain names.
Gérer les adresse IP flottantes (Cliquer pour une image plus grande)