Translations:Managing your cloud resources with OpenStack/14/en
Jump to navigation
Jump to search
Mounting a Volume on a VM
Attaching a Volume

- Attaching is the process of associating a volume with a VM. This is analogous to inserting a USB key or plugging an external drive into your personal computer.
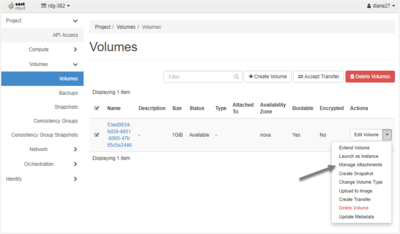
- You can attach a volume from the Volumes page in the Dashboard.
- At the right-hand end of the line describing the volume is the Actions column; from the drop-down menu, select "Manage Attachments."
- In the "Attach To Instance" drop-down menu, select a VM.
- Click the blue "Attach Volume" button.
Attaching should complete in a few seconds. Then the Volumes page will show the newly created volume attached to your selected VM on /dev/vdb or some similar location.
Formatting a newly created Volume
- Formatting is the process of preparing a volume to store directories and files.
- Before a newly created and attached volume can be used, it must be formatted.
- Formatting erases all existing information on a volume and therefore should be done with care.
- See instructions for doing this on a Linux or Windows VM.
Mounting a Volume
- Mounting is the process of mapping the volume's filesystem logically within the VM's directory and file structure.
- To mount the volume, use a command similar to
[name@server ~]$ sudo mount /dev/vdb1 /mntdepending on the device name, disk layout, and the desired mount point in your filesystem.
This command makes the volume's directory and file structure available under the VM's /mnt directory.